


Changing the guide bearing on a Trend router cutter |
||||
 |
||||
|
There are a number of reasons why you may wish to change a guide bearing: |
||||
To alter the cutting depth of a router cutter |
||||
 |
The cutting depth is how far into the material a bit can cut. A guide bearing will limit the cutting depth, depending on its diameter.
The smaller the guide bearing’s diameter, the further into material the router bit can cut.
A larger diameter guide bearing will keep the cutting edges further out of the material, creating a shallower cut. |
|||
After sharpening a router cutter |
||||
 |
The more a router bit is sharpened, or honed, the smaller the cutting edges will become. Eventually, they may not extend out as far as the guide bearing. As a result, you will need to replace it with a smaller one. Various bearing sizes are available so you should be able to find one of an appropriate size. |
|||
Wear and tear on the bearing |
||||
 |
With frequent use, the surface of the bearing can become worn, preventing it from rolling evenly along the work surface. The bearing of router bits are considered consumables that may need to be replaced before the end of the router bit's life.
Over time, it can also become stiff and unable to turn freely on its axis. If you experience either of these problems, it may be time to purchase a new bearing. |
|||
 |
||||
How to change a shank-mounted guide bearing on a router cutter |
||||
Removing the guide bearing |
||||
 |
Step 1 - Locate the set screwLocate the screw, which is set into the retaining collar on the router cutter. Step 2 - Select an appropriate keySelect a hex or Allen key that fits the hexagonal slot on the set screw. The instructions with individual cutters should state which key to use. Various spare and are available if needed.
Step 3 - Turn the screw anti-clockwiseTurn the set screw in an anti-clockwise direction to loosen the retaining collar. are available that include a collar, a hex key, and a grub screw. |
|||
 |
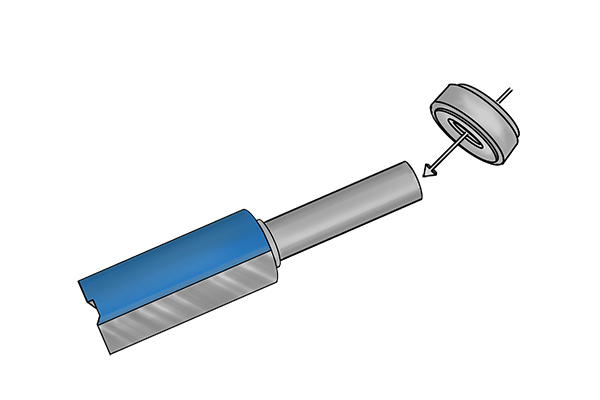
Step 4 - Remove the set screw, retaining collar and bearingRemove the screw and set aside in a safe place. You should now be able to slide the retaining collar and the guide bearing off the shank of the router bit. can be bought individually or in . You can also get , with bearings of different sizes, , or for extra protection, you can choose or . |
|||
Installing the guide bearing |
||||
 |
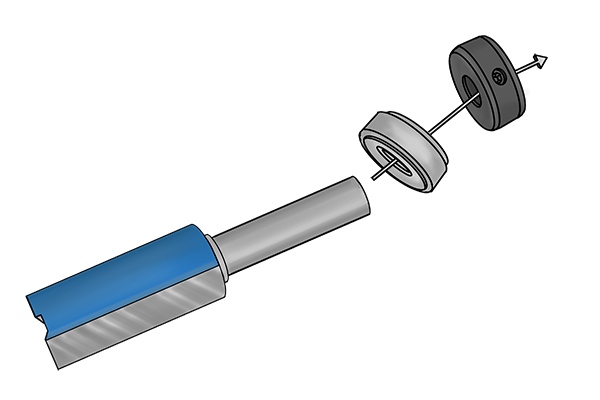
Step 1 - Insert the new bearingOne you have selected an appropriate replacement guide bearing, slide it onto the shank of the router cutter. |
|||
 |
Step 2 - Insert the retaining collarSlide the retaining collar back onto the shank, and tighten by turning the set screw clockwise. |
|||
 |
Step 3 - Ensure the bearing spinsCheck that the guide bearing can spin freely on the shank of the router bit before you begin working with it. Don't use any lubricant on a guide bearing, the bearing will have its own lubrication and additional chemicals can damage the bearing. |
|||
 |
||||
How to change a bottom-mounted guide bearing on a router cutter |
||||
Removing the guide bearing |
||||
 |
Step 1 - Select a keySelect an appropriate hex or Allen key that fits the hexagonal slot on the router bit’s cap screw. Spare , or that include keys are available. |
|||
 |
Step 2 - Loosen screwInsert the key into the end of the cap screw and turn it in an anti-clockwise direction to loosen. Continue turning the key until the cap screw is completely removed and set aside in a safe place. |
|||
 |
Step 3 - Remove the guide bearingYou can now remove the guide bearing and any washers, and the shield if there is one. Various replacement bearings are available, depending on the cutter type and size. can be bought or they can be bought in , or you can get that contain bearings of different sizes, , , or . |
|||
Installing the guide bearing |
||||
 |
When the bearing has been removed, you will be left with a metal spindle, on which you can place a new guide bearing and replace any washers and the shield, if needed. Replacement washers are available as router cutter spare parts.
Step 1 - Insert the cap screw and tightenWhen the new bearing and washer is in place, insert the cap screw and tighten it by rotating the key in a clockwise rotation. |
|||
 |
Step 2 - Ensure the bearing spinsOnce all the parts are in place, check the guide bearing can spin freely on the spindle before you begin work. You should not use any lubricant or any solvents on the guide bearing, especially if it is a Trend bearings, as they will be packed for life with special grease for built-in lubrication. |
|||
 |
||||
